How to Clean an Airbrush: The Complete Guide (2026)
If there’s one thing that separates people who enjoy airbrushing from people who quit in frustration, it’s cleaning. Not technique, not equipment — cleaning.
I know it’s not glamorous. Nobody picks up an airbrush because they’re excited about maintenance. But here’s the reality after 13+ years of airbrushing: almost every “broken” airbrush I’ve ever seen just needed a proper cleaning. Sputtering, clogging, inconsistent spray, paint coming out when it shouldn’t — 90% of these problems trace back to dried paint somewhere it shouldn’t be.
The good news? Cleaning an airbrush is simple once you have a system. There are only three types of cleaning, each takes a specific amount of time, and once the routine is built into your workflow, it becomes automatic. This guide covers all three, plus what to do when things have gone wrong and dried paint needs serious intervention.
The Three Levels of Airbrush Cleaning
Not every paint change requires a full teardown. That’s the mistake most beginners make — they either don’t clean enough (and wonder why colors are muddy) or they completely disassemble after every color (and spend more time cleaning than painting).
Here’s the system:
Level 1: Quick Flush — Between color changes during a session. Takes 30–60 seconds. No disassembly.
Level 2: End-of-Session Clean — When you’re done painting for the day. Takes 3–5 minutes. Needle removed, not much else.
Level 3: Deep Clean — When performance degrades, after using difficult paints, or as scheduled monthly maintenance. Takes 15–30 minutes. Full disassembly.
Let’s walk through each one.
Level 1: Quick Flush (Between Colors)
This is what you’ll do dozens of times per painting session. The goal is simple: get the previous color out so the next color isn’t contaminated.
What you need: Cleaning solution or water (for acrylics), paper towel or cleaning pot
Steps:
-
Spray out remaining paint. Point the airbrush into your cleaning pot or onto scrap material and spray until the cup is nearly empty. Don’t waste paint — if you have usable paint left, pour it back into the bottle first.
-
Wipe the cup. Use a cotton swab, piece of paper towel, or a stiff-bristle brush to wipe visible paint from the cup walls. This takes five seconds and prevents the biggest source of color contamination.
-
Add cleaner, swirl, dump. Put a few drops of cleaning solution (or water for water-based acrylics) into the cup. Swirl it around with your brush or swab. Dump this rinse — don’t spray it through, as partially dissolved pigment can clog the nozzle.
-
Add clean solution and spray through. Fill the cup about a third full with clean solution. Spray through the airbrush onto a white paper towel until the spray runs completely clear. If it’s still showing color after 10 seconds of spraying, dump and repeat with fresh cleaner.
-
Load your next color. Once the spray is clear, you’re ready. The tiny residual amount of cleaning solution in the passages will mix harmlessly with your next paint and evaporate within the first few sprays.
Pro tip: Keep a squeeze bottle of cleaning solution right next to your airbrush. The faster you can rinse, the less likely you are to skip it and end up with contaminated colors.
The Backflush Technique
You’ll see this recommended everywhere: cover the nozzle with your finger while pulling the trigger, forcing air backward through the paint passages. This creates bubbles in the cup and is supposed to dislodge stuck paint.
Opinions differ on this. Some artists swear by it, others think it’s overrated and just pushes contaminated liquid into the air valve area where it doesn’t belong. My take: it’s useful for a quick agitation during color changes, but don’t overdo it — especially with solvent-based paints, as forcing solvents backward into the air valve area can damage seals over time.
If you do backflush, do it gently and briefly. One or two seconds of bubbling, then spray forward to clear everything out.
Level 2: End-of-Session Clean (Done for the Day)
This is the cleaning that protects your airbrush overnight and for the next session. If you skip this and let paint dry inside the passages, you’re setting yourself up for a frustrating next session.
What you need: Cleaning solution, paper towel, cotton swabs, soft brush (old paintbrush or dedicated cup brush), cleaning pot
Time: 3–5 minutes
Steps:
-
Empty the cup and do a quick flush (Level 1 steps above).
-
Remove the needle.
- Unscrew the handle (back end of the airbrush)
- Loosen the needle chucking nut (the small nut that holds the needle in place)
- Gently pull the needle straight back and out
-
Clean the needle. Hold the needle near the middle and wipe it from the chuck end toward the tip with a cloth or paper towel dampened with cleaning solution. Always wipe toward the tip, never back toward the middle — you don’t want to push paint residue backward. Rotate the needle as you wipe to clean all sides. The tip should be shiny and clean with no paint visible.
IMPORTANT: Inspect the needle tip. If it’s bent — even slightly — it will affect your spray pattern. A bent tip needs straightening on a sharpening stone or replacement. See our troubleshooting guide for details.
-
Clean the cup thoroughly. Use a cotton swab or stiff brush with cleaning solution to scrub the inside of the cup, especially the paint passage at the bottom (the small opening that leads down into the body of the airbrush). This hidden channel is where paint accumulates and causes mysterious clogs.
-
Spray cleaner through the body. With the needle removed, add cleaning solution to the cup and spray it through. Without the needle in place, the passage is wider and cleaner flows more freely. Spray until the output is completely clear.
-
Wipe the nozzle exterior. Use a cotton swab dampened with cleaner to wipe the face of the nozzle (the tip where paint exits). Paint builds up here and causes “tip dry” — a ring of dried paint around the nozzle that disrupts the spray pattern.
-
Reassemble. Reinsert the needle from the back, sliding it gently forward until it seats in the nozzle. You should feel it stop — don’t force it. Tighten the chucking nut (finger-tight, never over-tighten), and replace the handle.
-
Optional: Apply a tiny drop of airbrush lubricant to the needle before reinserting. This keeps the needle moving smoothly through the packing/seal and prevents paint from creeping up along the needle. Badger Regdab, Iwata Lube, or even a tiny touch of petroleum jelly works.
What NOT To Do
- Don’t leave paint in the cup overnight. Even “just water-based” acrylics will dry and cause problems.
- Don’t leave the needle soaking in cleaner. Prolonged soaking can damage seals and o-rings.
- Don’t push the needle in from the back without the nozzle in place. The sharp tip will poke right through the nozzle opening and could bend.
- Don’t use excessive force on anything. If something is stuck, soak it — don’t wrench it.
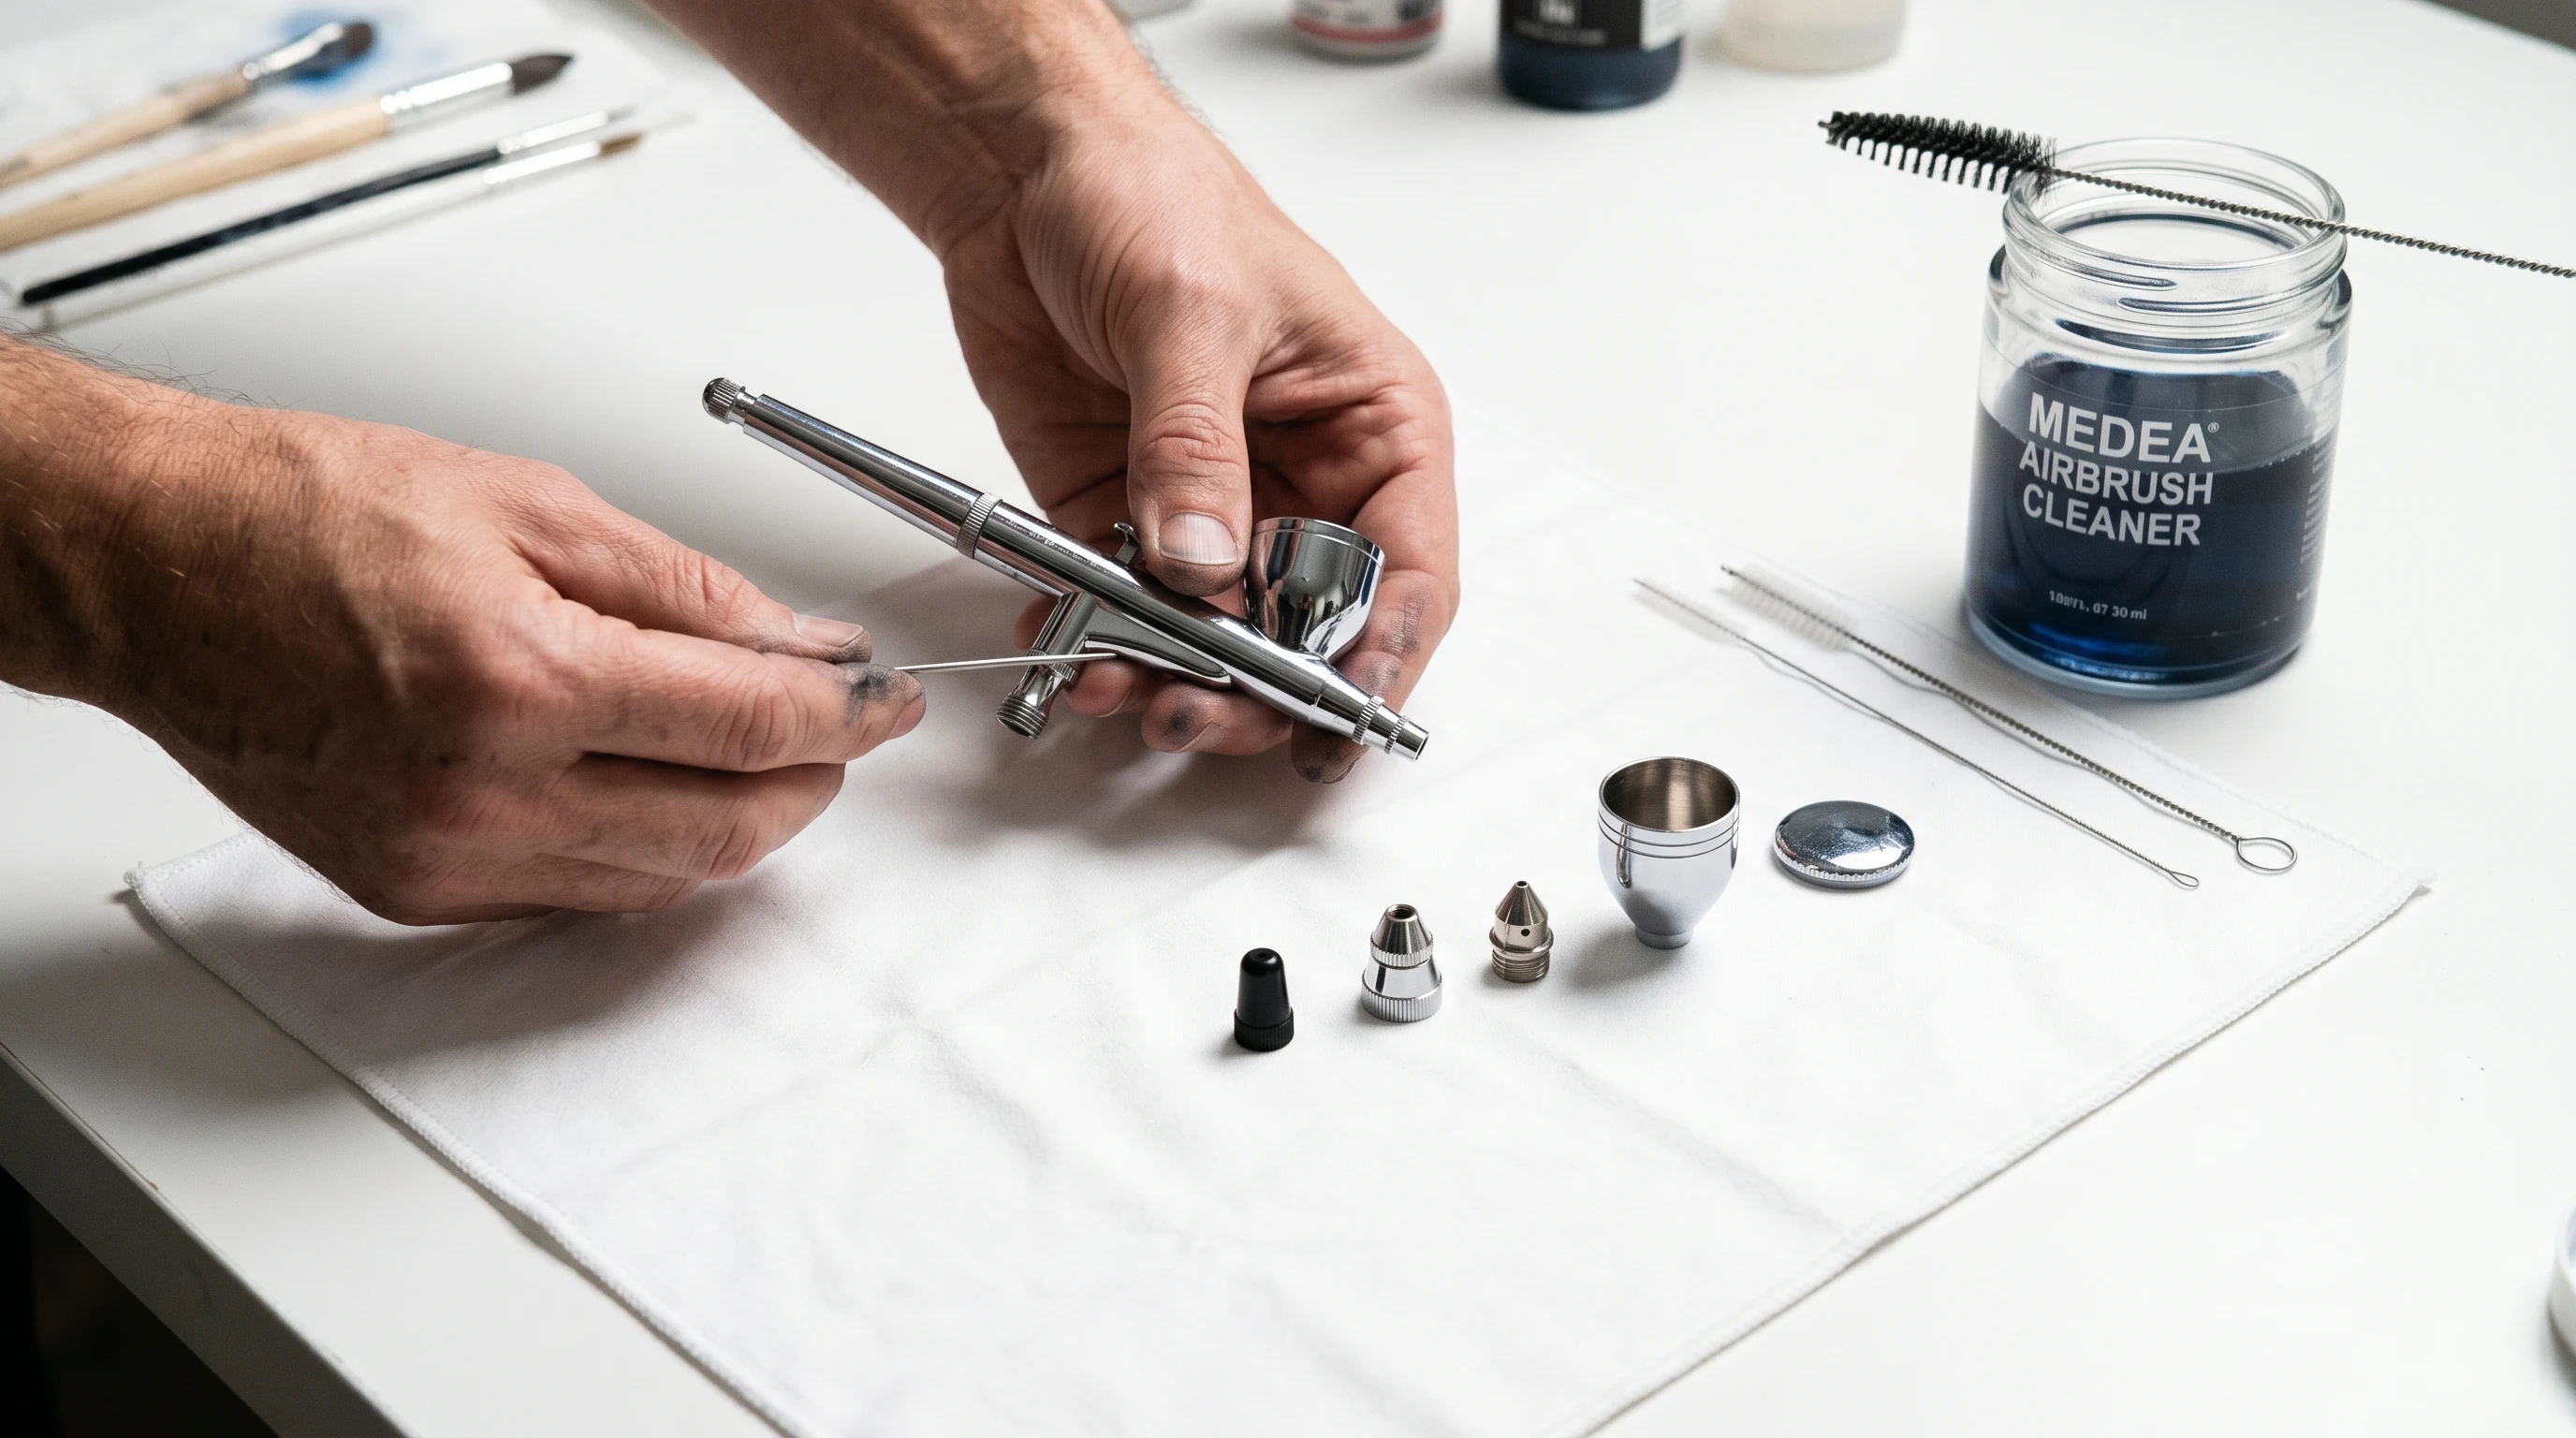
Level 3: Deep Clean (Full Disassembly)
Do this once a month during regular use, or immediately when you notice performance problems (inconsistent spray, sputtering that doesn’t resolve with basic cleaning, reduced paint flow).
What you need: Cleaning solution, interdental brushes or specialized airbrush cleaning brushes, cotton swabs, soft cloth, small wrench (for threaded nozzles), cleaning pot, good lighting, optionally an ultrasonic cleaner
Time: 15–30 minutes
Before you start: Take a photo of your airbrush assembled. Especially if this is your first deep clean, having a reference for reassembly saves stress.
Disassembly
Every airbrush brand is slightly different, but the general order is:
-
Remove the handle (unscrew from the back)
-
Remove the needle (loosen chuck nut, pull straight back)
-
Remove the needle cap (the protective cover over the nozzle tip — unscrews by hand)
-
Remove the nozzle cap / air cap (unscrews by hand — this is the part with the air holes that surrounds the nozzle)
-
Remove the nozzle — This is the most delicate step.
- Compression-fit nozzles (Harder & Steenbeck): Simply lift out once the air cap is removed. These are easy.
- Threaded nozzles (Iwata, Badger, most others): Use the small nozzle wrench that came with your airbrush. Turn gently counterclockwise. If it’s stuck, soak the front end of the airbrush in cleaner for a few minutes first. NEVER force a stuck nozzle — the threads are extremely fine and cross-threading will ruin it.
-
Remove the trigger (optional — only if you suspect paint has gotten into the air valve area, which happens with aggressive backflushing or if paint leaked past the needle seal)
Lay parts out in order on a clean white cloth or paper towel. This makes reassembly much easier.
Cleaning Individual Parts
Nozzle: The most critical and most delicate part. Soak in cleaning solution for 5–10 minutes (no longer — extended soaking can damage some materials). Use an interdental brush or a wooden toothpick to gently clear the internal opening. Never use metal tools inside the nozzle — scratching the precision bore ruins the spray pattern. Hold it up to a light source — you should see a perfectly round, clear hole.
Needle: Wipe clean with a dampened cloth as in Level 2. Inspect the tip under good light or a magnifying glass. It should be perfectly sharp and centered. Any bend, hook, or burr means it needs attention.
Air cap / nozzle cap: Clean the air holes with an interdental brush and cleaning solution. Paint accumulates in the small air holes and disrupts atomization.
Cup and body: Use airbrush cleaning brushes (the long thin ones specifically designed for airbrush internal passages) to clean inside the body. Push the brush through the paint passage from the cup end down toward the nozzle opening. You’ll be surprised how much dried paint comes out even after regular end-of-session cleaning.
Needle chuck area: Wipe out the inside of the chuck area with a cotton swab and cleaner. Paint can accumulate here over time.
Trigger and air valve (if removed): Clean with cotton swabs and cleaner. Check o-rings for wear or damage.
Reassembly
Reassemble in reverse order. Key points:
- Nozzle first — seat it carefully. For threaded nozzles, turn clockwise gently until snug. DO NOT over-tighten. For compression-fit, just drop it in place.
- Air cap / nozzle cap — screw on by hand.
- Needle — slide in from the back, gently push forward until it seats in the nozzle. You should feel a soft stop.
- Tighten chuck nut — finger-tight only.
- Handle — screw back on.
- Test — connect air, add water to the cup, and spray. Should produce a fine, centered, even mist. If it sprays off-center or sputters, check nozzle seating and needle position.
Cleaning Solutions: What to Use for Each Paint Type
The #1 rule: the solvent that thins your paint will also clean it. Don’t overcomplicate this.
Water-Based Acrylics (Createx, Vallejo, Golden, Citadel, etc.)
For quick flush and between colors: Plain water works fine while paint is still wet. Warm water works faster than cold.
For end-of-session and deep clean: Dedicated airbrush cleaner is much more effective than water alone at dissolving dried residue. Good options:
- Createx Airbrush Cleaner (4008) — industry standard, works with all Createx and most water-based paints
- Iwata Medea Airbrush Cleaner — excellent general-purpose cleaner
- Vallejo Airbrush Cleaner — good companion to Vallejo paints
- Isopropyl alcohol (IPA) — works well but can damage rubber o-rings with prolonged use. Use the 91% or 99% concentration.
- DIY option: Window cleaner (ammonia-based) — surprisingly effective in a pinch. Windex or similar. The ammonia dissolves dried acrylics well.
Solvent-Based Paints (Lacquers, Enamels, Urethanes)
Use the paint manufacturer’s recommended thinner. For lacquers, lacquer thinner. For enamels, enamel thinner or mineral spirits. For urethanes, the specific urethane reducer made for that paint system.
Safety note: Solvent-based cleaners produce harmful fumes. Always clean in a well-ventilated area or spray booth, and wear a respirator with organic vapor cartridges. This is not optional — lacquer thinner and similar solvents are genuinely dangerous to inhale.
What About Acetone?
Acetone dissolves almost everything, which makes it extremely effective at removing dried paint. However, it also destroys rubber and PTFE seals, damages some plastic components, and produces strong fumes. Use acetone only as a last resort for soaking individual metal parts — never spray it through your airbrush, and never soak assembled components in it.
Ultrasonic Cleaners
An ultrasonic cleaner is a worthwhile investment if you deep clean regularly. Place disassembled metal parts (nozzle, air cap, needle cap) in the ultrasonic bath with cleaning solution for 3–5 minutes. The ultrasonic vibration reaches places that brushes can’t, and it’s particularly effective for nozzles with stubborn buildup.
A small jewelry-size ultrasonic cleaner ($25–40) is perfectly adequate for airbrush parts. Don’t leave parts in for extended cycles — 5 minutes is plenty.
Rescuing a Neglected Airbrush
We’ve all been there. Life got busy, the airbrush sat with paint in it for a week (or a month… or longer). Now it’s completely clogged and nothing sprays. Here’s how to bring it back:
Step 1: Don’t Panic, and Don’t Force
The worst thing you can do is try to push the needle through dried paint. You’ll bend the needle tip or worse, damage the nozzle. Take a breath. This is fixable.
Step 2: Soak
Disassemble what you can without forcing anything. If the nozzle won’t unscrew, soak the front end of the airbrush in cleaning solution (or IPA for acrylics) for 30 minutes to an hour. For really stubborn dried paint, overnight soaking may be needed.
If the needle is stuck, don’t pull it. Apply a few drops of cleaner into the cup and let it soak down along the needle for 15–20 minutes. Try again gently. Repeat if needed.
Step 3: Remove Softened Paint
Once soaking has loosened things, disassemble and clean each part individually:
- Soak the nozzle separately in cleaner for 10–15 minutes
- Use interdental brushes to clear internal passages
- Use a wooden toothpick (never metal) inside the nozzle
- Clean the needle with solvent-dampened cloth
Step 4: Soak Stubborn Parts in Ultrasonic Cleaner
If manual cleaning isn’t cutting it, an ultrasonic cleaner with warm cleaning solution will usually break through the last of the dried paint. 5–10 minutes in the ultrasonic bath.
Step 5: Reassemble and Test
Once everything is clean, reassemble and test with water. If it sprays cleanly, you’re back in business. If the spray pattern is still off, the nozzle may be permanently damaged and need replacement.
When to Replace Instead of Clean
Some parts have a limited lifespan no matter how well you maintain them:
- Nozzles — The precision bore gradually wears from needle friction. If cleaning doesn’t restore a good spray pattern, replace the nozzle. Budget $5–20 depending on brand.
- Needles — Bent tips can sometimes be straightened on a fine sharpening stone, but replacement ($8–15) is often easier and more reliable.
- O-rings and seals — These degrade over time, especially with solvent use. If you notice air leaking from unexpected places, replace the o-ring kit ($5–10).
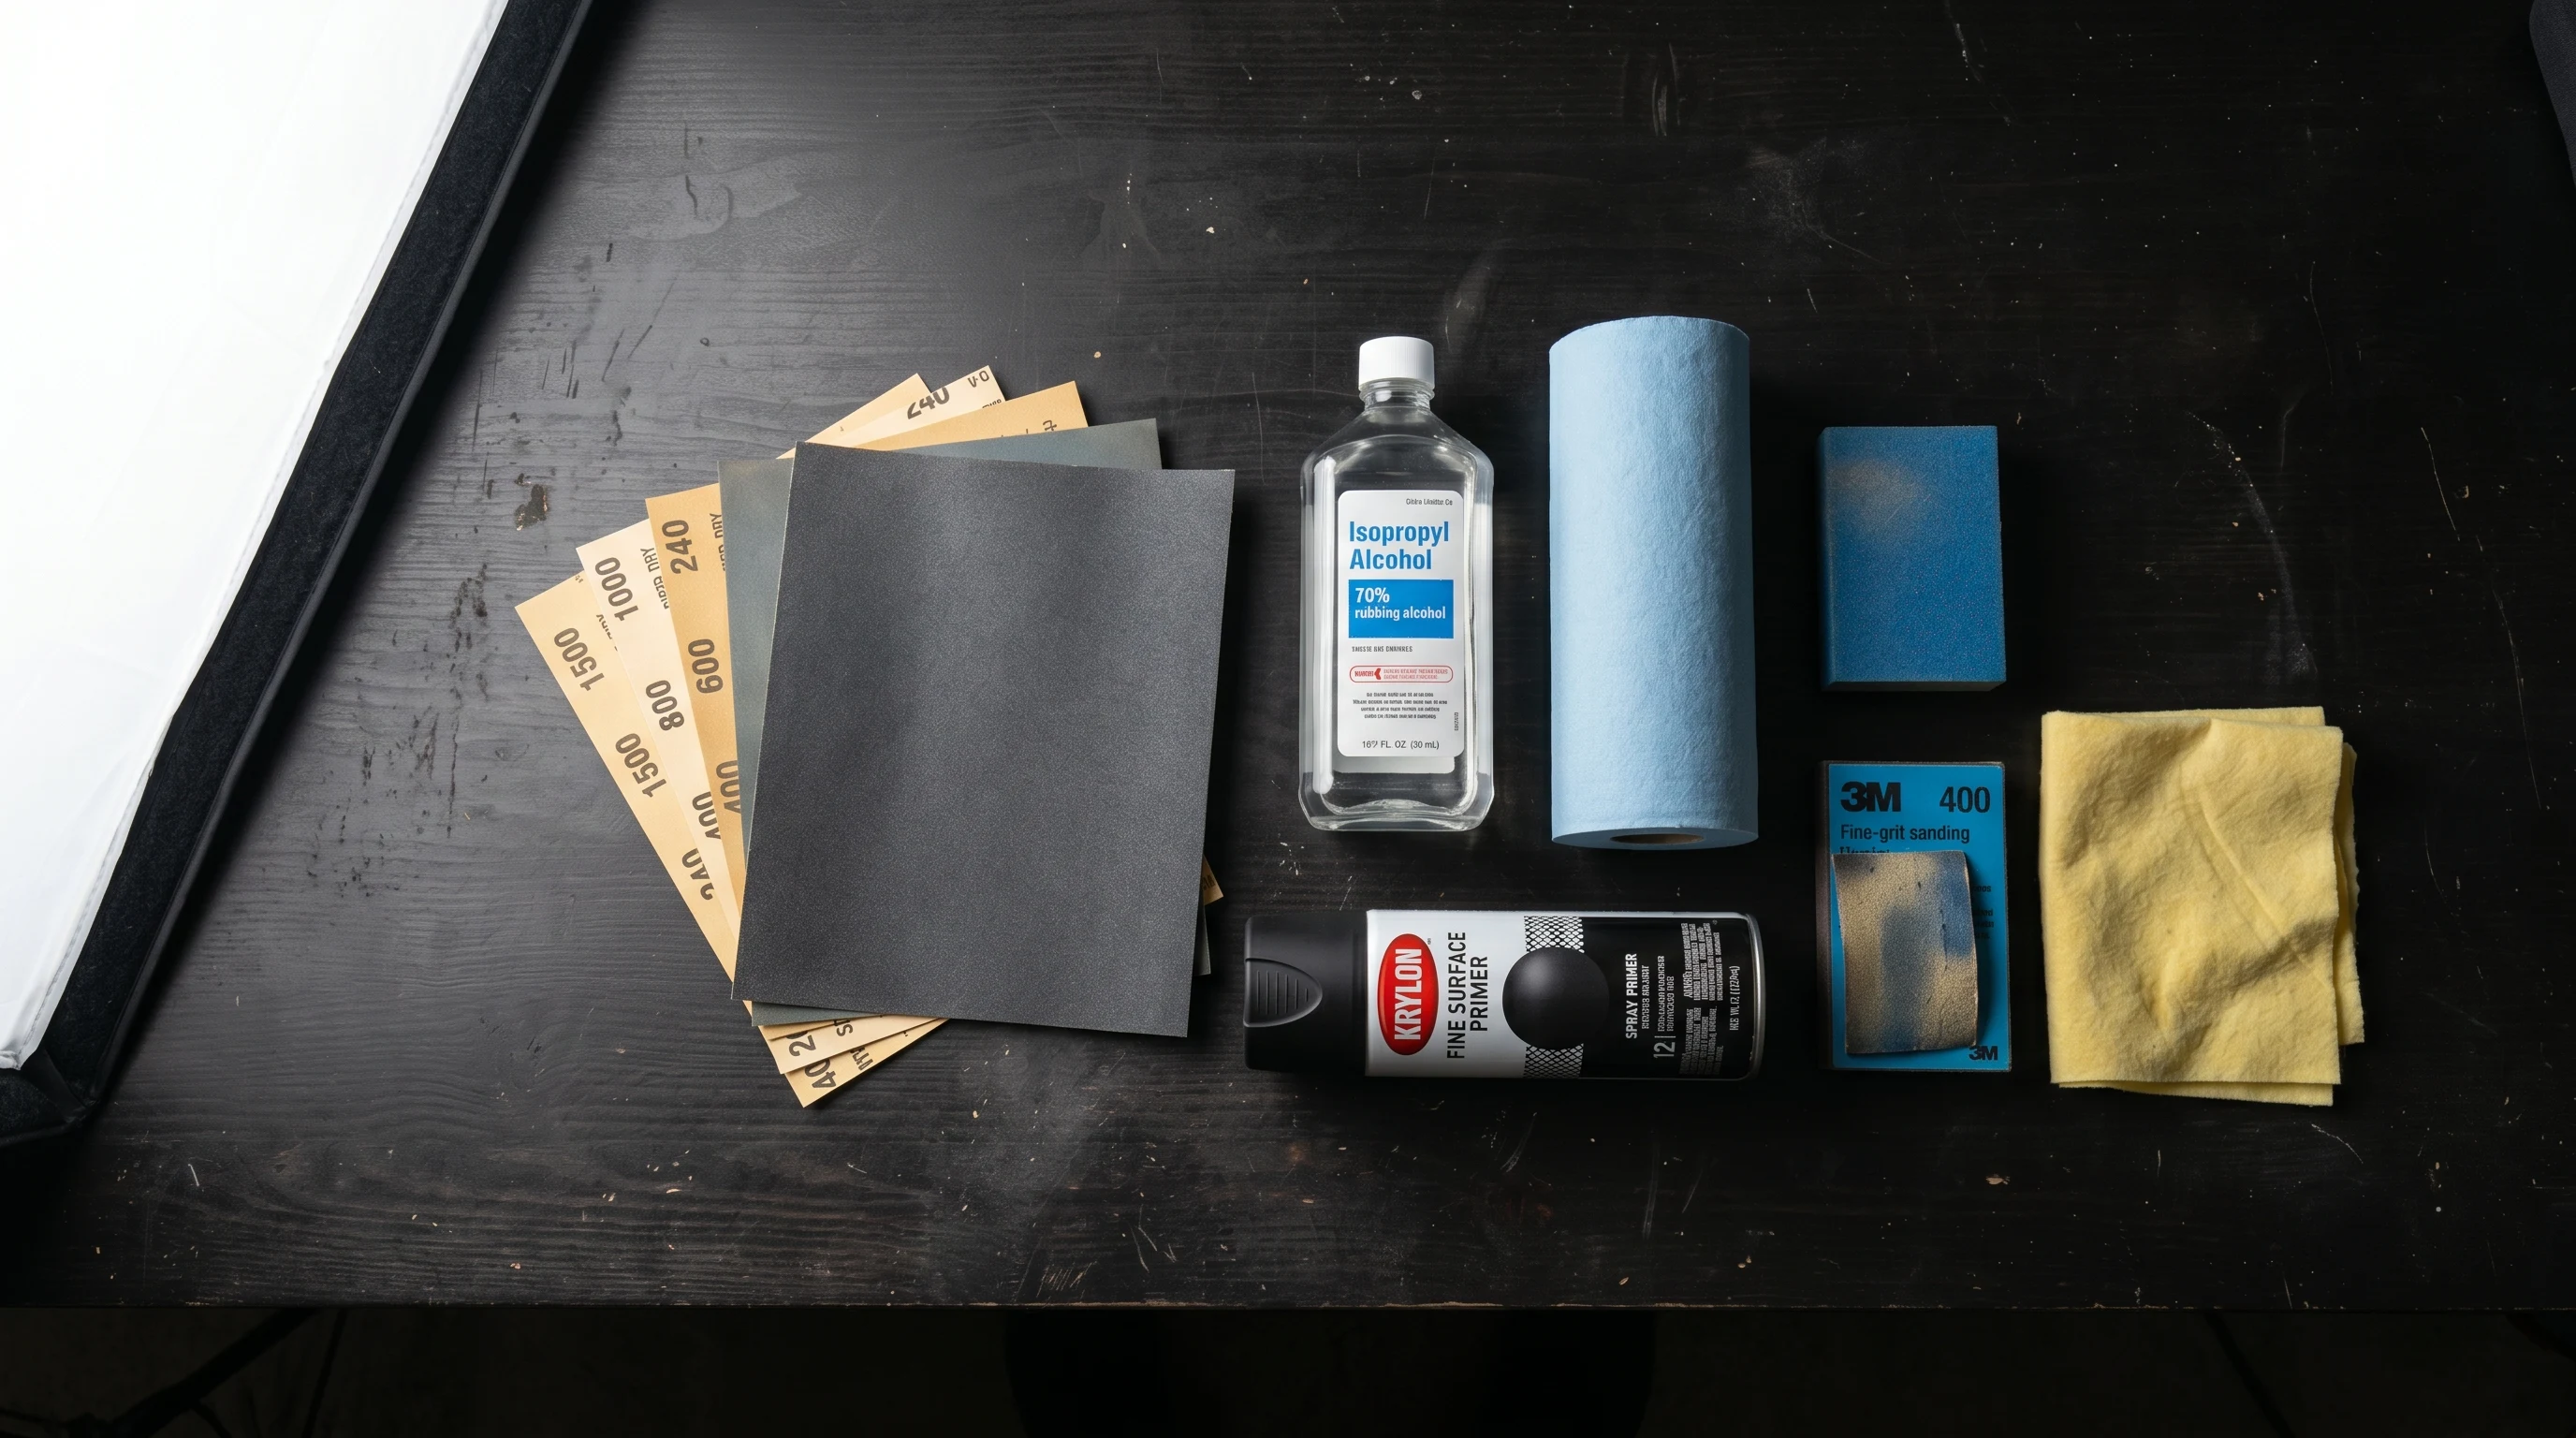
Essential Cleaning Supplies
Here’s everything you need for a complete cleaning setup:
Must-Have:
- Airbrush cleaner appropriate for your paint type (Createx 4008, Iwata Medea, or Vallejo)
- Cleaning pot / spray-out pot — catches overspray and solvent mist during flushing. The 3-in-1 cleaning pots also hold your airbrush and have a filter.
- Interdental brushes (various sizes) — cheap, disposable, perfect for nozzles and internal passages. Buy a bulk pack from the pharmacy.
- Cotton swabs — for cup cleaning and detail work
- Paper towels / lint-free cloths — for needle wiping and general cleanup
- Soft-bristle cup brush — old paintbrush or dedicated airbrush cup brush
Nice-to-Have:
- Airbrush cleaning brush set — long, thin brushes specifically for airbrush internal passages. More effective than interdental brushes for deep cleaning.
- Airbrush lubricant — keeps needle sliding smoothly, prevents paint creep. Badger Regdab, Iwata Lube, or similar.
- Ultrasonic cleaner — small jewelry-size unit, game-changer for deep cleaning nozzles.
- Magnifying glass or loupe — for inspecting needle tips and nozzle condition.
- Squeeze bottle — fill with cleaning solution for quick dispensing into the cup.
Cleaning Tips by Airbrush Brand
While the process is fundamentally the same across all airbrushes, a few brand-specific notes are helpful:
Harder & Steenbeck (Evolution, Infinity, Ultra)
H&S airbrushes use a compression-fit (drop-in) nozzle system — no threading, no wrench needed. This makes disassembly and cleaning significantly easier than threaded nozzle designs. Just remove the air cap and the nozzle lifts right out. This is one of the major practical advantages of H&S airbrushes.
Tip: The H&S nozzle seal is a small o-ring that sits behind the nozzle. Check it during deep cleans — it’s tiny and easy to lose, but essential for preventing air leaks and cup bubbling.
Iwata (Eclipse, HP-CS, Revolution, Neo)
Iwata uses threaded nozzles on most models. Always use the included nozzle wrench — never pliers or fingers (the nozzle is too small to grip by hand and too fragile for pliers). Turn gently.
Iwata Eclipse note: The Eclipse BS, SBS, and CS models have a compression-fit nozzle that should never be unscrewed. Only the nozzle head cap should be removed. Check your manual.
Badger (Patriot, Renegade, Sotar)
Badger airbrushes generally use threaded nozzles with a wrench. Badger nozzles tend to be slightly more robust than Iwata’s, but the same careful handling applies.
Tip: Badger sells Regdab needle lubricant — it’s one of the best needle lubes available and worth keeping in your cleaning kit.
Chinese/Budget Airbrushes (Master, Gocheer, Ophir, etc.)
Budget airbrushes often have rubber o-rings instead of PTFE seals. This means solvent-based cleaners (lacquer thinner, strong IPA) will degrade the seals much faster than on branded airbrushes. Stick to water and water-based cleaners when possible, and replace o-rings more frequently.
Cleaning Schedule: How Often for Each Level
| Cleaning Level | When | Time |
|---|---|---|
| Quick flush | Every color change | 30–60 seconds |
| End-of-session | After every painting session | 3–5 minutes |
| Deep clean | Monthly, or when performance drops | 15–30 minutes |
| Rescue clean | When paint has dried inside | 30–60 minutes |
If you follow this schedule, your airbrush will last decades. Literally. Airbrushes are precision instruments, but they’re mechanically simple — there’s not much that can go wrong if paint isn’t allowed to dry where it shouldn’t.
Frequently Asked Questions
Can I use water to clean my airbrush?
Yes, for water-based acrylic paints — but only while the paint is still wet. Water alone won’t dissolve dried acrylics effectively. For end-of-session and deep cleaning, use a dedicated airbrush cleaner or isopropyl alcohol. For solvent-based paints (lacquers, enamels), water won’t work at all — use the appropriate thinner.
How do I know when my airbrush is clean enough?
Spray cleaning solution through the airbrush onto a white paper towel or into a cleaning pot. When the spray runs perfectly clear with no hint of color, you’re clean. For end-of-session cleaning, also visually inspect the cup and needle — no visible paint residue should remain.
Can I use isopropyl alcohol to clean my airbrush?
Yes, IPA (91% or 99%) works well for cleaning water-based acrylics and is more effective than water at dissolving dried paint. However, prolonged soaking in IPA can damage rubber o-rings and seals, especially on budget airbrushes. Use it for cleaning passes and needle wiping, but don’t leave parts soaking in it for extended periods.
What’s the best airbrush cleaning solution?
For water-based paints, Createx Airbrush Cleaner (4008) and Iwata Medea Airbrush Cleaner are both excellent and widely available. For solvent-based paints, use the manufacturer’s recommended thinner. There’s no single “universal” cleaner that works perfectly for all paint types — match your cleaner to your paint.
My nozzle is stuck and won’t unscrew. What do I do?
Don’t force it. Soak the front end of the airbrush in cleaning solution or warm water for 30 minutes to soften any dried paint that’s binding the threads. Try again gently with the nozzle wrench. If still stuck, repeat the soak for longer. As a last resort, apply a tiny drop of penetrating oil to the threads and wait. Forcing a stuck nozzle will strip the fine threads and ruin the body.
Is an ultrasonic cleaner worth buying for airbrush cleaning?
If you use your airbrush regularly, yes. A small jewelry-size ultrasonic cleaner ($25–40) does an excellent job of cleaning nozzles and small parts, especially when paint has dried in hard-to-reach areas. It’s not essential — you can achieve the same results with patience and manual cleaning — but it saves significant time during deep cleans.
Should I lubricate my airbrush needle?
Yes, a tiny amount of needle lubricant (Badger Regdab, Iwata Lube, or a small touch of petroleum jelly) on the needle helps it slide smoothly through the packing seal. This prevents paint from creeping backward along the needle and makes trigger action feel smoother. Apply a very thin film — too much lubricant can contaminate your paint.
How do I clean dried Createx paint out of my airbrush?
Createx once cured is particularly stubborn. Soak affected parts in Createx 4008 Cleaner or in ammonia-based window cleaner for 30–60 minutes. An ultrasonic cleaner with warm cleaning solution speeds this up significantly. For really bad cases, Createx Restorer (4001) is a stronger formulation designed specifically for dissolving cured Createx paint.
Final Thought
Think of airbrush cleaning the way a chef thinks about keeping knives sharp — it’s not separate from the craft, it IS part of the craft. Every professional airbrush artist I know has a cleaning routine that’s completely automatic. They don’t think about it any more than they think about breathing.
Build the habit now, and your airbrush will reward you with consistent, frustration-free performance for years.
- Airbrush Troubleshooting: Every Common Problem & Fix — When cleaning alone doesn’t solve it
- How to Prepare Any Surface for Airbrush Painting — Get your surface right before you start
- How to Choose the Right Airbrush Paint in 2026 — Paint recommendations by project type
- Best Airbrush for Beginners in 2026 — Airbrush buying guide
- Best Airbrush Compressor in 2026 — Compressor guide