How to Thin Acrylic Paint for Airbrush: Ratios, Methods & Brand-Specific Guide
If I had to pick the single most important skill for airbrush success, it wouldn’t be trigger control or distance work — it would be paint thinning. Get the consistency right and your airbrush practically runs itself. Get it wrong and you’ll spend more time clearing clogs than painting.
The standard advice is “thin to the consistency of milk.” That’s a good starting point, but it’s not the whole picture. Different brands, different colors within the same brand, different needle sizes, and different projects all need slightly different ratios. After 13+ years of working with dozens of paint brands, here’s a practical guide to getting it right every time.
The Golden Rule: Why Thinning Matters
An airbrush nozzle is tiny — 0.2mm to 0.5mm in diameter. That’s the width of a few human hairs. Paint needs to flow through this opening as an atomized mist, not as a thick paste. When paint is too thick, it can’t atomize properly. You get sputtering, clogging, spattering, uneven coverage, and the dreaded “tip dry” (paint drying on the needle tip and disrupting the spray pattern).
When paint is too thin, you get a different set of problems: runs, poor coverage, transparent results where you wanted opacity, and paint pooling on the surface.
The goal is the sweet spot between — thin enough to atomize into a fine, controllable mist, thick enough to actually cover and adhere to the surface.
What to Thin With: Your Options
Distilled Water — The Default for Acrylics
Plain distilled water thins any water-based acrylic paint. It’s cheap, safe, odorless, and always available. For quick thinning during a painting session, water works perfectly.
Why distilled, not tap? Tap water contains minerals (calcium, chlorine, etc.) that can react with paint pigments and cause subtle color shifts or texture issues. Distilled water has no minerals. The cost difference is negligible — a gallon of distilled water costs about $1 and lasts months.
Limitation: Water alone doesn’t contain the additives that make paint flow optimally through an airbrush. It thins the paint but doesn’t improve flow properties. For casual work, this doesn’t matter. For demanding work (fine detail, glazing, long sessions), a proper thinner performs better.
Dedicated Airbrush Thinners — The Professional Choice
Brand-specific and universal airbrush thinners contain flow improvers, surfactants, and sometimes retarders (drying-time extenders) in addition to the water base. These additives help paint flow through the airbrush more smoothly, reduce tip dry, and improve leveling on the surface.
Recommended thinners:
- Createx 4012 High Performance Reducer — designed for Createx paints but works with most water-based acrylics. Excellent flow improvement.
- Vallejo Airbrush Thinner (71.261) — specifically formulated for Vallejo Model Air and Game Air. Maintains color intensity.
- Tamiya X-20A Acrylic Thinner — the standard for Tamiya acrylics. Not recommended for non-Tamiya paints (different chemistry).
- Liquitex Airbrush Medium — formulated for fine art acrylics. Maintains binder strength even at high dilution.
- Golden Airbrush Medium — another fine art option, extends working time.
Flow Improver — The Secret Weapon
Flow improver (sometimes called “flow aid” or “flow enhancer”) is not a thinner — it reduces the surface tension of paint without significantly thinning it. Adding 1–2 drops of flow improver to your thinned paint mixture dramatically reduces tip dry and helps paint level out on the surface for smoother results.
Vallejo Airbrush Flow Improver (71.262) is the most popular option. A single bottle lasts ages because you use 1–2 drops per cup load.
Pro tip: Many experienced painters use a mixture of thinner + flow improver rather than thinner alone. Typical recipe: 80% thinner, 20% flow improver. Keep a pre-mixed bottle at your workstation.
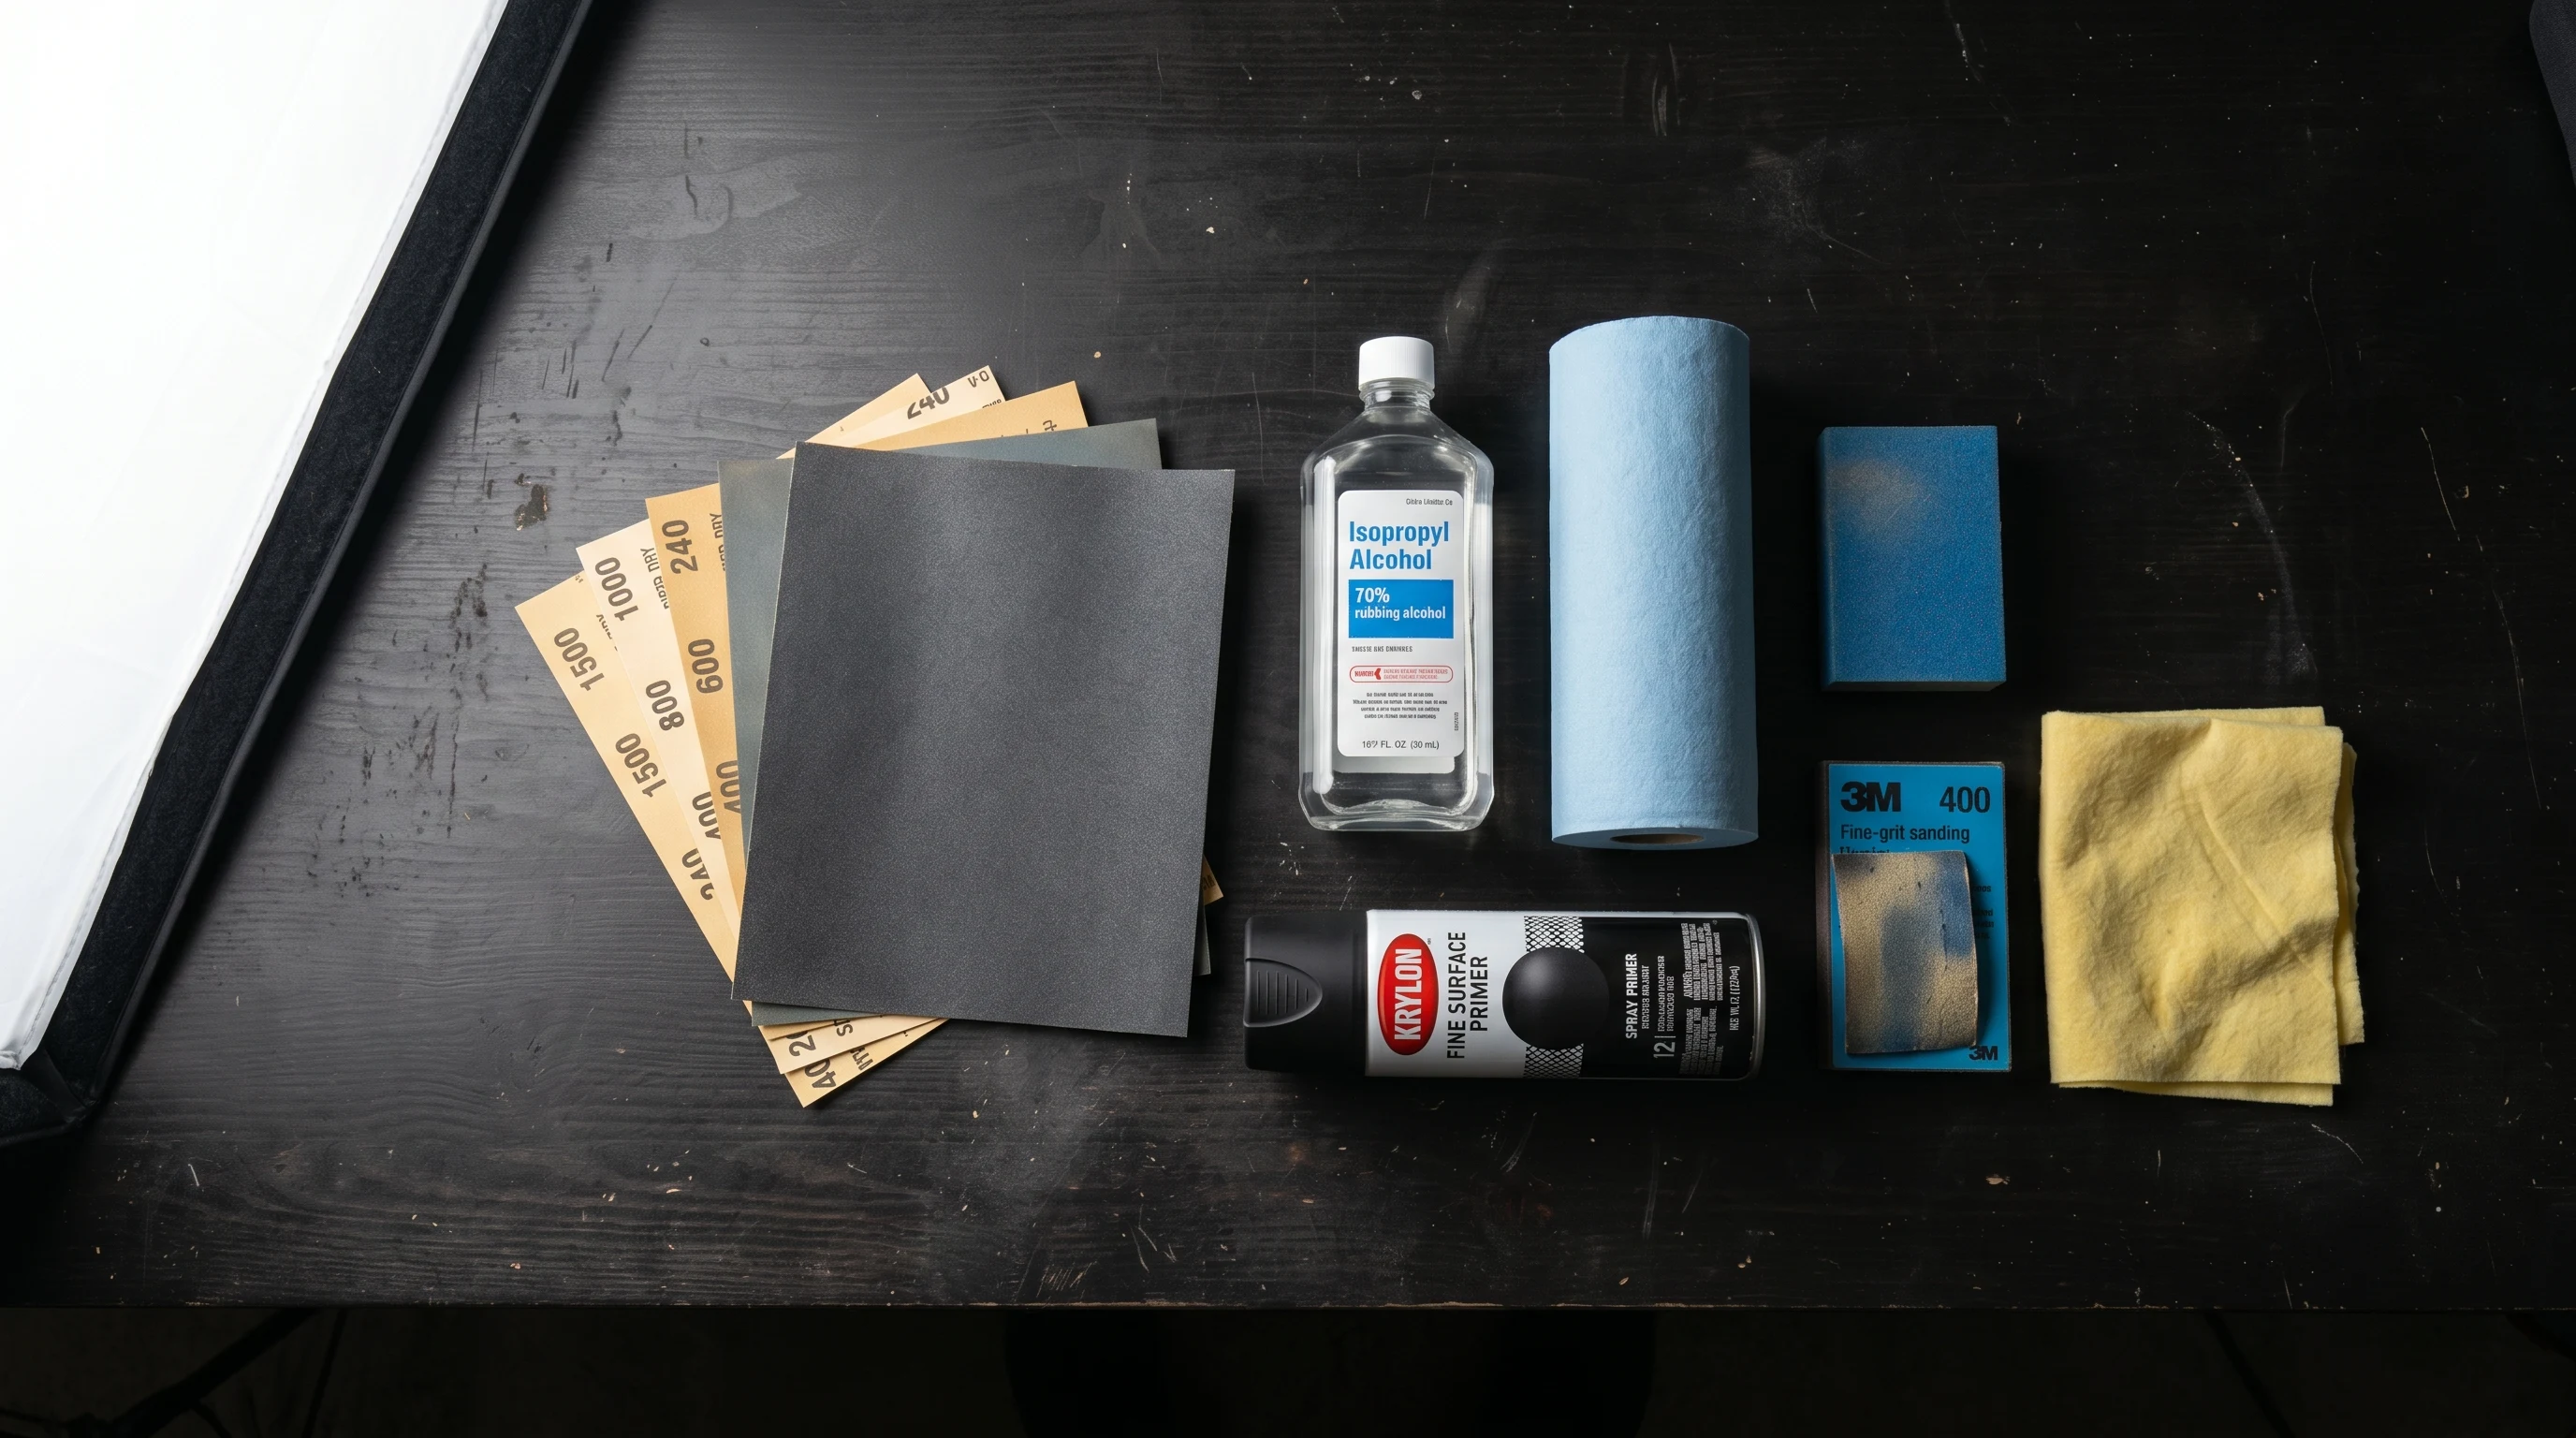
Isopropyl Alcohol (IPA)
IPA works as a thinner for water-based acrylics and is especially effective at breaking surface tension. However, it evaporates much faster than water, which can cause paint to dry even faster in the airbrush (the opposite of what you usually want). It can also cause some paints to curdle or separate if added too quickly.
Best used for: Cleaning between colors, and as a component in DIY thinner recipes (not as the sole thinner).
DIY Thinner Recipe
A popular homemade airbrush thinner that performs surprisingly well:
- 50% distilled water
- 40% isopropyl alcohol (91% or 99%)
- 10% Vallejo Flow Improver (or any commercial flow improver)
Mix in a squeeze bottle, shake well. This produces a thinner that’s cheap, effective, reduces tip dry, and works with most water-based acrylics. The alcohol helps the paint break surface tension and atomize better, the flow improver prevents tip dry, and the water provides the base dilution.
Thinning Ratios by Brand
Every paint brand has different starting viscosity, so “1:1” means different things for different paints. Here’s a practical reference table based on real-world use, not marketing materials.
Brand-Specific Starting Ratios
| Paint Brand & Line | Starting Ratio (Paint : Thinner) | Best Thinner | Notes |
|---|---|---|---|
| Createx Airbrush Colors | 1:1 for general, up to 1:4 for fine detail | Createx 4012 Reducer | Already thin; fine work needs heavy reduction |
| Createx Wicked/Illustration | 1:1 to 1:2 | Createx 4012 Reducer | Higher pigment; less reduction needed |
| Vallejo Model Air | Ready to spray (add 10–20% for fine detail) | Vallejo Airbrush Thinner | Designed for airbrush; minimal thinning needed |
| Vallejo Game Air | Ready to spray (add 10–20% for fine detail) | Vallejo Airbrush Thinner | Same as Model Air |
| Vallejo Model Color | 1:1 to 1:1.5 | Vallejo Airbrush Thinner | Brush paint; needs significant thinning |
| Citadel Air | Ready to spray (add a few drops of thinner) | Water or Vallejo Thinner | Pre-thinned but benefits from a touch more |
| Citadel Base/Layer | 1:1 to 1:2 | Water or Vallejo Thinner | Thick brush paints; need real thinning |
| Tamiya Acrylics (X/XF) | 1:1 to 1:1.5 | Tamiya X-20A Thinner | Use ONLY Tamiya thinner (alcohol-based formula) |
| AK Interactive 3rd Gen | Ready to spray (add 10%) | AK Thinner or Vallejo | Modern formula; very thin from bottle |
| Golden High Flow | Ready to spray | Golden Airbrush Medium | Pre-thinned to airbrush consistency |
| Golden Fluid Acrylics | 1:1 to 1:2 | Golden Airbrush Medium | Fine art paint; add medium to preserve binder |
| Liquitex Soft Body | 1:1 to 1:2 | Liquitex Airbrush Medium | Fine art paint; needs dedicated medium |
| Craft acrylics (Apple Barrel, FolkArt, etc.) | 1:2 to 1:3 | Distilled water + flow improver | Very thick; coarse pigment may still clog |
| Badger Stynylrez (primer) | Ready to spray (10–20% thinner for fine nozzles) | Distilled water | Shake very well before use |
| Vallejo Surface Primer | Ready to spray to 1:0.5 | Vallejo Thinner or water | Thick from bottle; thin 10–30% |
These are starting points. You’ll adjust based on your specific airbrush (needle size), working pressure, and desired effect. Fine detail at low PSI needs thinner paint. Coverage coats at higher PSI can use slightly thicker paint.
How to Test Consistency: The Practical Methods
The Milk Test (Classic)
Thin your paint until it has the viscosity of skim milk. You can test this by picking up a drop with a brush or stirring stick — it should drip off smoothly in a continuous stream, not hang in a thick blob. If it runs like water, it’s too thin. If it sits on the stick like cream, it’s too thick.
This is a reliable starting point, but “milk” is vague. Here’s a more precise version:
The Needle Line Test (Better)
Drag a needle, toothpick, or the end of a brush through your thinned paint in the mixing cup. Watch the channel it creates:
- Channel closes instantly → Too thin. Add more paint.
- Channel slowly closes over 1–2 seconds → Perfect consistency for most work.
- Channel stays open → Too thick. Add more thinner.
The Drop Test (Best for Repeatability)
Put a drop of thinned paint on a piece of white paper or card stock held at a 45° angle. Watch how it behaves:
- Runs immediately like water → Too thin.
- Moves slowly, leaving a visible trail → Good for basecoating and coverage.
- Barely moves, stays as a drop → Too thick.
- Moves at medium speed, thin trail → Good for detail and glazing.
The Test Spray (Always Do This)
Before painting your actual project, always spray a test burst onto scrap material (white paper towel works well). Check for:
- Smooth, even mist → Good to go
- Spattering or sputtering → Too thick, or pressure too low
- Runs and pooling → Too thin, or spraying too close
- Grainy texture → Not mixed well enough, or pigment too coarse for nozzle size
- Immediate tip dry → Add flow improver
Thinning by Needle Size
Your airbrush’s needle diameter directly affects how thin your paint needs to be:
| Needle Size | Thinning Required | Typical Use |
|---|---|---|
| 0.15–0.2mm | Heavy thinning (1:2 to 1:3) | Ultra-fine detail, glazing, miniature work |
| 0.3–0.35mm | Medium thinning (1:1 to 1:1.5) | General detail work, most applications |
| 0.5mm | Light thinning (1:0.5 to 1:1) | Basecoating, priming, larger coverage |
Smaller nozzles are less forgiving of thick paint. A 0.5mm nozzle will spray paint that would instantly clog a 0.2mm nozzle. If you switch between needle sizes, remember to adjust your thinning ratio accordingly.
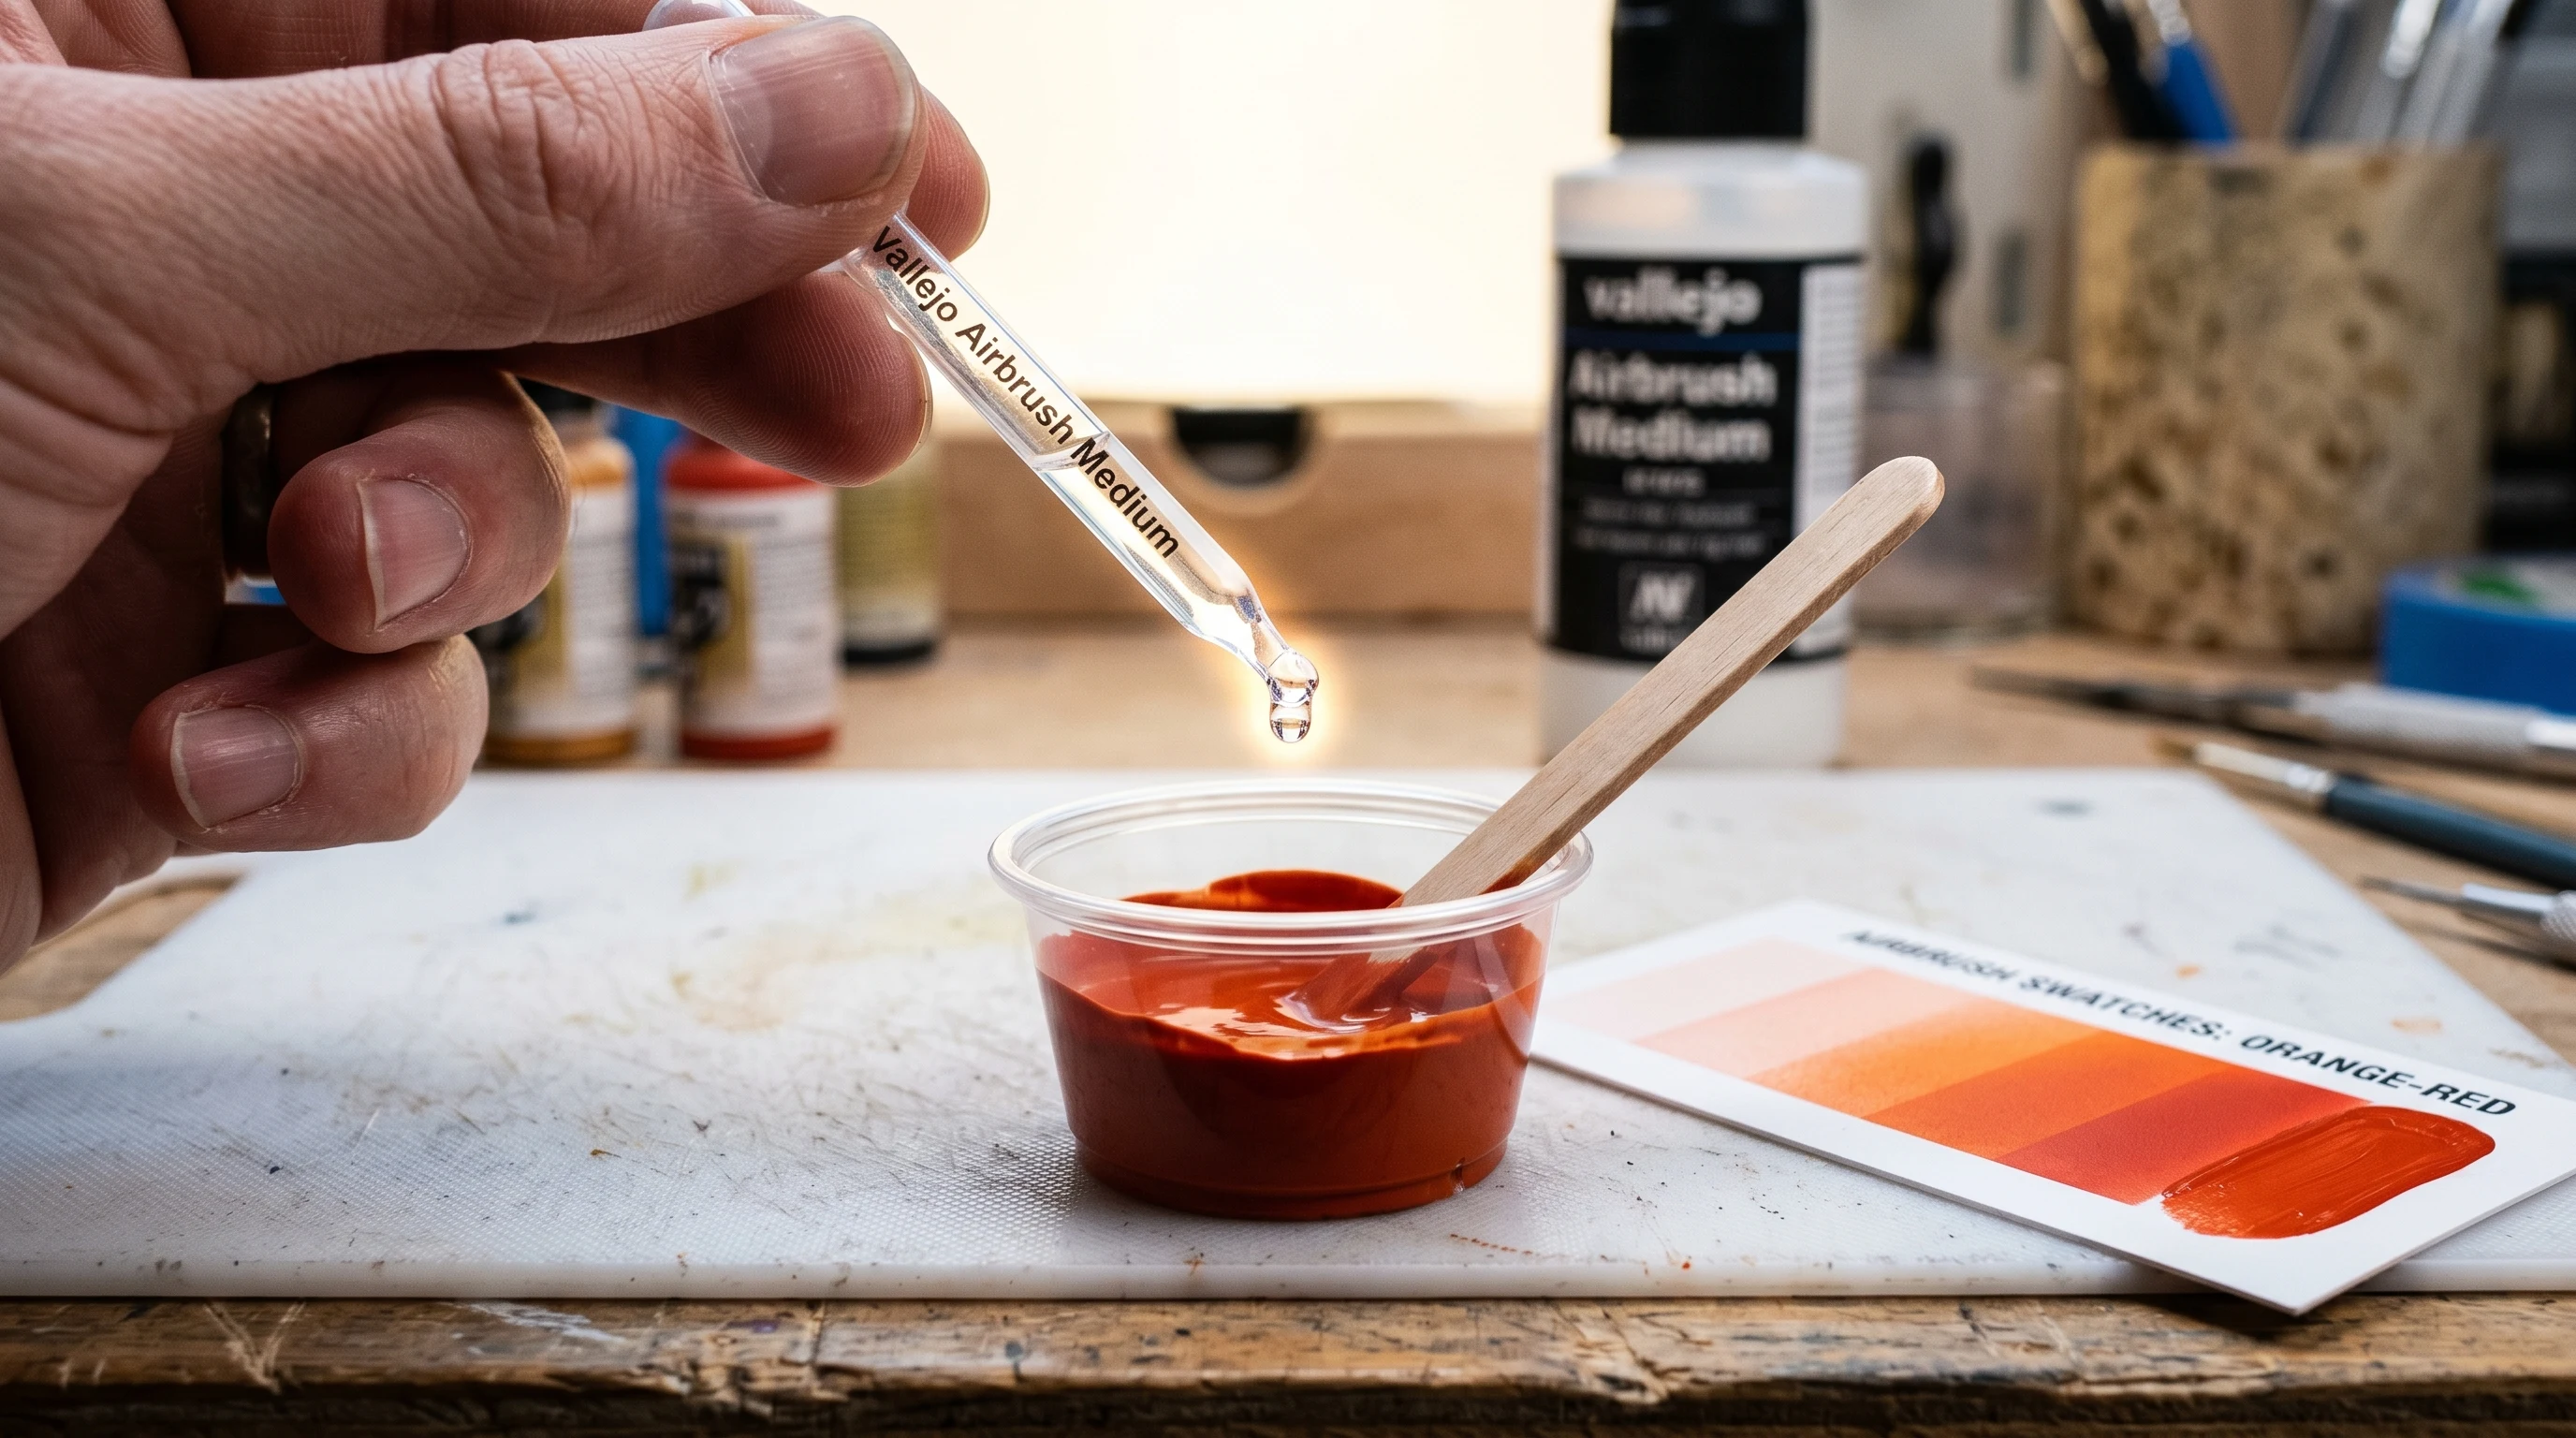
How to Mix: The Right Way
Always mix outside the airbrush cup. This is non-negotiable for consistent results.
-
Put paint in a small mixing cup. Disposable plastic cups or glass jars work well. Use a pipette or dropper for precise amounts.
-
Add thinner gradually. Don’t dump the full amount at once. Add about half of your estimated thinner, stir, check consistency, then add more as needed. It’s easy to add more thinner — impossible to un-thin paint.
-
Stir thoroughly. Use a small stick, the back of a brush, or a mini whisk. Make sure there are no streaks or unmixed pigment. Poorly mixed paint is the #1 cause of mysterious clogs — clumps of undissolved pigment block the nozzle.
-
Strain if using thick paints. For craft acrylics, Citadel Base/Layer, or any paint that tends to be lumpy, pour the thinned mixture through a fine mesh strainer or piece of nylon stocking into the airbrush cup. This catches pigment clumps before they reach the nozzle.
-
Load the airbrush cup. Pour or pipette your pre-mixed paint into the cup. Don’t overfill — half-full is usually ideal. Overfilling causes spills when you tilt the airbrush.
Common Thinning Problems and Fixes
Paint Too Thick
Symptoms: Sputtering, clogging, orange-peel texture, tip dry, uneven coverage, need to increase PSI excessively
Fix: Add more thinner in small increments. Also check that paint is thoroughly mixed — undissolved pigment creates the same symptoms as thick paint.
Paint Too Thin
Symptoms: Runs, pooling, transparent coverage, color looks washed out, paint takes forever to dry
Fix: Add more paint to the mixture. Or spray from further distance and use multiple thin coats rather than trying to get coverage in one pass. Two thin coats always beat one thick coat.
Tip Dry
Symptoms: Paint dries on the needle tip, disrupting the spray pattern. Requires constant wiping.
Fix: Add 1–2 drops of flow improver to your paint mixture. Flow improver reduces surface tension, which prevents paint from drying at the nozzle tip. Also consider using a retarder (slows drying time) if working in hot/dry conditions.
Grainy Spray
Symptoms: Texture in the spray pattern, visible dots instead of smooth mist
Fix: Usually caused by either under-thinning or by pigment particles that are too large for the nozzle. Some craft paints have coarsely ground pigments that simply won’t work through a fine (0.2mm) nozzle no matter how much you thin them. Switch to a paint formulated for airbrush use, or use a larger nozzle.
Colors Look Different After Thinning
Symptoms: Color appears lighter or more transparent than expected
Fix: This is normal — thin paint is more transparent. Build up color with multiple thin layers rather than trying to match bottle color in one coat. Each layer adds pigment and opacity. Two to three thin coats typically achieve full opacity with proper adhesion.
Special Cases
Metallic Paints
Metallic acrylics contain tiny mica flakes that create the shimmer effect. These flakes are larger than regular pigment particles and can settle quickly after thinning. Mix thoroughly and use a slightly larger nozzle (0.35mm+) when possible. Avoid over-thinning metallics — the flakes separate from the binder and you lose the metallic effect.
Tip: Spray metallics at medium PSI (20–25) rather than low. Higher atomization helps distribute the metallic flakes evenly.
Fluorescent / Neon Paints
Fluorescent pigments are inherently coarser and more transparent than standard pigments. They require more thinning but also more coats for opacity. Spray over a white base for maximum vibrancy.
Primers
Airbrush primers (Badger Stynylrez, Vallejo Surface Primer) are formulated for airbrush use but vary in thickness. Stynylrez sprays well with minimal thinning (0–20%). Vallejo Surface Primer from the bottle can be quite thick and often benefits from 20–30% thinning. Always shake primer bottles vigorously for at least two minutes before use — primer pigments settle heavily.
See our surface preparation guide for primer application techniques.
Frequently Asked Questions
What is the best ratio to thin acrylic paint for airbrush?
A 1:1 ratio of paint to thinner (equal parts) is the best universal starting point for most acrylic paints. From there, adjust based on your specific paint brand, needle size, and desired effect. Airbrush-ready paints (Vallejo Model Air, Golden High Flow) need little to no additional thinning. Thick brush paints (Citadel Base, craft acrylics) may need 1:2 or even 1:3 ratios.
Can I use water to thin acrylic paint for airbrush?
Yes. Distilled water works for all water-based acrylic paints. However, water alone doesn’t improve flow properties the way dedicated airbrush thinners do. For best results, use a dedicated thinner or add a few drops of flow improver to the water. Always use distilled water, not tap water, to avoid mineral contamination.
What consistency should airbrush paint be?
The target consistency is similar to skim milk — paint should flow freely from a brush or stirring stick in a smooth, continuous stream. For fine detail work with small nozzles (0.15–0.2mm), aim even thinner. For basecoating with larger nozzles (0.5mm), slightly thicker is fine. Always do a test spray before painting your actual project.
Why does my airbrush keep clogging even with thinned paint?
Common causes beyond insufficient thinning include: unmixed paint (pigment clumps blocking the nozzle), paint drying in the cup during long sessions, tip dry building up on the needle, or using paints with coarsely ground pigments that simply won’t pass through a fine nozzle. Make sure paint is thoroughly mixed, add flow improver to combat tip dry, and use paints formulated for airbrush use.
Can I thin Citadel paint for airbrush?
Yes. Citadel Base and Layer paints require significant thinning (1:1 to 1:2 with water or Vallejo Airbrush Thinner). Citadel Air paints come pre-thinned and usually just need a few drops of thinner for optimal performance. Citadel Contrast paints can be sprayed through an airbrush for subtle pre-shading effects, but they behave differently through an airbrush than when brush-applied.
Is airbrush thinner the same as water?
No. Dedicated airbrush thinners contain additives beyond water — flow improvers to reduce surface tension, retarders to slow drying time, and surfactants to improve atomization. These additives make a noticeable difference in spray quality and reduce tip dry. Water works as a basic thinner, but dedicated thinners produce better results, especially for demanding applications.
Final Tip
Keep a paint journal. When you find the perfect ratio for a specific paint at a specific pressure with your specific airbrush, write it down. Every paint brand, every color line, and even individual colors within a line can behave differently. Building your own reference table eliminates guesswork and makes every future session faster and more consistent.
- How to Choose the Right Airbrush Paint — Paint recommendations by project type
- How to Clean an Airbrush — Essential maintenance after every session
- How to Prepare Any Surface for Airbrush Painting — Primer application guide
- Airbrush Troubleshooting Guide — When problems persist after proper thinning
- Essential Airbrush Accessories & Tools — Mixing cups, pipettes, and other supplies