Airbrush FAQ: 30 Questions Every Beginner Asks (Answered by a 13-Year Pro)
After 13+ years of airbrushing and answering questions from beginners, I’ve noticed the same questions come up over and over. Here are the 30 most common — answered clearly and honestly.
Equipment Questions
What airbrush should I buy as a beginner?
A dual-action, gravity-feed airbrush with a 0.3–0.5mm needle from a reputable brand (Iwata, Harder & Steenbeck, Badger, Paasche). The Iwata Eclipse HP-CS and Harder & Steenbeck Ultra 2024 are the two most recommended starter airbrushes. Budget: $70–170 for the airbrush alone. See our full beginner guide for detailed recommendations.
[Internal link: Best Airbrush for Beginners 2026]
Do I need a compressor with a tank?
Strongly recommended. A tank stores compressed air and delivers it smoothly. Without a tank, the compressor pulses air, which creates visible pulsing in your spray. Even a small tank eliminates this. See our compressor guide for specific recommendations.
[Internal link: Best Airbrush Compressor 2026]
What’s the difference between single-action and dual-action?
Single-action: press the trigger and both air and paint flow together. Simple to use but limited control. Dual-action: press down for air, pull back for paint — independently. More control, more versatile, slightly steeper learning curve. For most applications, dual-action is worth learning from the start.
What needle size do I need?
For beginners: 0.3–0.5mm. This range is forgiving and versatile. Smaller needles (0.15–0.2mm) are for fine detail work but clog more easily. Larger needles (0.5mm+) are for coverage and priming. A 0.35mm needle is the single most versatile size. See our complete needle size guide.
[Internal link: Airbrush Needle Sizes Explained]
Gravity feed or siphon feed?
Gravity feed for most people. It works at lower pressure, wastes less paint, cleans faster, and is better for detail work. Siphon feed is better for T-shirts and large-area work where you need high paint volume without constant refilling. See our detailed comparison.
[Internal link: Gravity Feed vs Siphon Feed]
Is a cheap airbrush kit worth buying?
The compressor in budget kits ($60–120) is often surprisingly adequate. The airbrushes are usually mediocre. Best strategy: buy a budget kit for the compressor, then add a quality brand-name airbrush separately. See our kit guide.
[Internal link: Best Airbrush Kit for Beginners]
How much should I spend on my first setup?
Minimum functional setup: $80–120 (budget kit). Quality setup: $150–250 (brand airbrush + decent compressor). Sweet spot for most beginners: $180–250. Don’t forget to budget $30–50 for essential accessories (respirator, cleaning supplies, paint).
Paint Questions
What paint should I use in my airbrush?
Use paints formulated for airbrush use. For general hobby: Createx Airbrush Colors or Vallejo Model Air. For miniatures: Vallejo Game Air or Citadel Air. For T-shirts: Createx textile colors. For fine art: Golden High Flow or Liquitex Soft Body with medium. See our complete paint guide.
[Internal link: How to Choose the Right Airbrush Paint]
Can I use regular acrylic paint in an airbrush?
Yes, but it must be thinned first. Standard acrylic paint is too thick for an airbrush. Thin with water or dedicated airbrush thinner to skim milk consistency (roughly 1:1 ratio for most paints). Craft-store acrylics have coarser pigments that may clog fine nozzles even when properly thinned. See our thinning guide for brand-specific ratios.
[Internal link: How to Thin Acrylic Paint for Airbrush]
How thin should airbrush paint be?
The classic answer is “skim milk consistency.” More precisely: thin enough to drip freely from a brush in a continuous stream, thick enough to leave visible color when sprayed. Starting ratio is 1:1 (paint:thinner) for most standard acrylics. Airbrush-ready paints (Vallejo Model Air, Golden High Flow) need minimal to no thinning.
[Internal link: How to Thin Acrylic Paint for Airbrush]
What’s the best thinner for airbrush paint?
Distilled water works for all water-based acrylics. Dedicated thinners (Createx 4012, Vallejo Airbrush Thinner) contain flow improvers that produce better results. For Tamiya paints, use only Tamiya X-20A thinner. Adding 1–2 drops of flow improver to any mixture reduces tip dry.
Do I need to wear a respirator?
Yes. Always. Even with “non-toxic” water-based paints. An airbrush atomizes paint into particles small enough to be inhaled deep into your lungs. A 3M half-face respirator with P100/organic vapor cartridges costs $25–35 and protects your health. This is the one piece of equipment you should never skip.
Technique Questions
What PSI should I airbrush at?
There’s no single correct answer — it depends on paint, needle size, and technique. General starting points: fine detail 15–20 PSI, general work 20–30 PSI, coverage/priming 25–40 PSI, T-shirts 30–45 PSI. Start low, increase until you get smooth atomization without sputtering.
How far should I hold the airbrush from the surface?
For fine lines: 1–3 inches (very close). For general work: 3–6 inches. For broad coverage: 6–12 inches. Closer = finer detail, more concentrated color. Further = wider pattern, lighter color deposit. Adjusting distance is how you control spray width in real-time.
Why am I getting spattering instead of a smooth spray?
Most common causes: paint too thick (thin more), air pressure too low (increase PSI), tip dry (add flow improver and wipe needle tip), dirty nozzle (clean your airbrush), or bent needle (inspect and replace if damaged). See our troubleshooting guide.
[Internal link: Airbrush Troubleshooting Guide]
How do I spray thin, even lines?
Practice. But the technique is: get very close to the surface (1–2 inches), use low pressure (12–18 PSI), use well-thinned paint, and move the airbrush at a consistent speed. The key is the trigger — apply air first (press down), then slowly pull back for minimal paint flow while moving your hand. It takes practice, but the motion becomes natural.
How do I prevent overspray?
Use masking tape, frisket film, or liquid mask to cover areas you don’t want paint on. Work at lower pressure when near edges. Get closer to the surface for more concentrated, controlled spray. Practice trigger control — the ability to spray very light amounts of paint is the key skill.
Cleaning Questions
How often should I clean my airbrush?
Between every color change (quick flush — 30 seconds). At the end of every session (thorough clean with needle removal — 3–5 minutes). Deep clean with full disassembly monthly or when performance degrades. Never let paint dry inside your airbrush. See our complete cleaning guide.
[Internal link: How to Clean an Airbrush]
What’s the best airbrush cleaning solution?
For water-based acrylics: Createx 4008 Airbrush Cleaner or Iwata Medea Airbrush Cleaner. Both dissolve dried acrylic paint effectively. For quick between-color flushes, distilled water works fine. For solvent-based paints, use the appropriate solvent recommended by the paint manufacturer.
Can I use water to clean my airbrush?
For water-based acrylic paints, yes — water works for quick flushes between colors. For thorough end-of-session cleaning, dedicated airbrush cleaner is more effective because it dissolves dried paint that water alone can’t remove. For solvent-based paints (enamels, lacquers), water does nothing — use appropriate solvents.
My airbrush nozzle is clogged. How do I fix it?
First try: backflush by covering the nozzle and pressing the trigger (creates backward pressure to dislodge the clog). If that fails: soak the nozzle in cleaning solution for 10–15 minutes, then use an interdental brush or cleaning needle to clear the passage. For severe clogs, an ultrasonic cleaner works wonders. Never force metal tools into the nozzle aggressively. See our cleaning guide’s “rescue” section.
[Internal link: How to Clean an Airbrush]
Surface & Preparation Questions
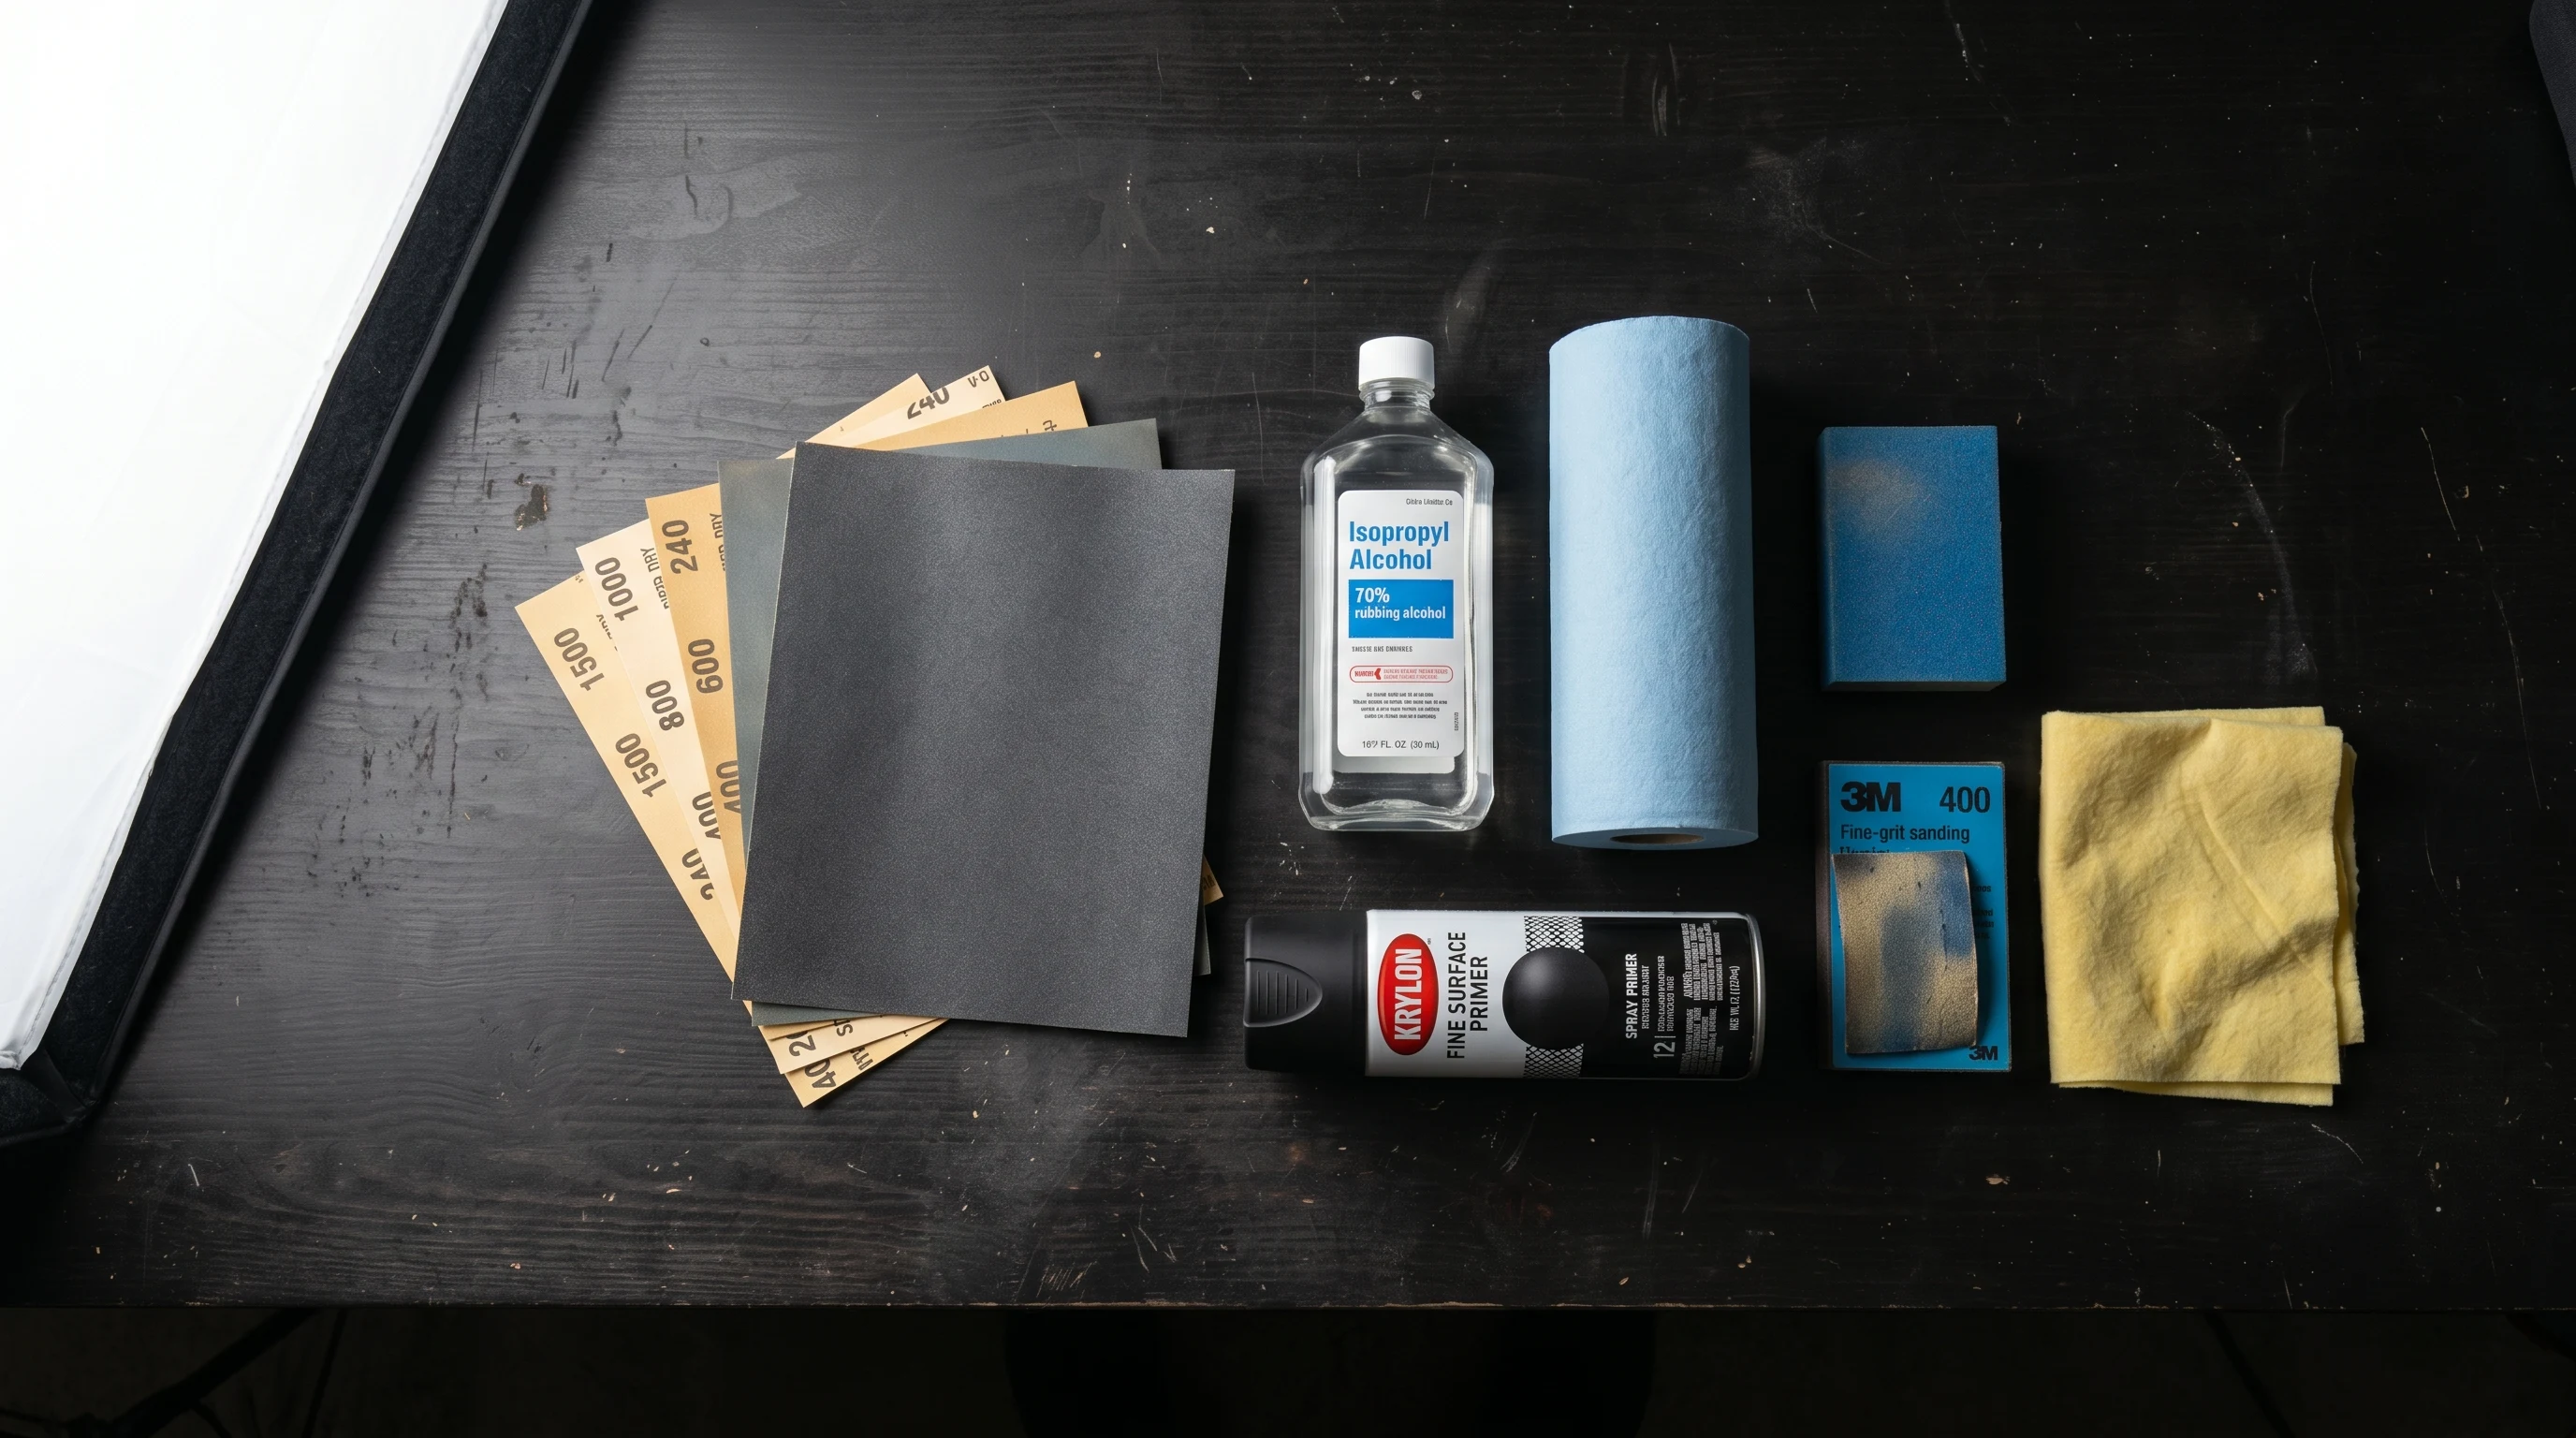
Do I need to prime before airbrushing?
For most surfaces, yes. Primer provides a uniform, adhesive surface for paint to grip. Without primer, paint may not adhere properly, may peel, or may appear uneven. Good airbrush primers: Badger Stynylrez, Vallejo Surface Primer. See our surface preparation guide.
[Internal link: How to Prepare Any Surface for Airbrush Painting]
Can I airbrush on any surface?
Most surfaces can be airbrushed with proper preparation. Paper, canvas, plastic, metal, wood, fabric, leather, ceramic, fondant — each needs specific surface prep and sometimes specific paint types. The key is adhesion: the surface must be clean, and paint/primer must be compatible with the material. See our surface prep guide for material-specific instructions.
[Internal link: How to Prepare Any Surface for Airbrush Painting]
Troubleshooting Questions
Why does paint bubble in the airbrush cup?
Air is leaking backward through the nozzle seal into the paint cup. Causes: loose nozzle, damaged nozzle o-ring/seal, cracked nozzle, or cross-threaded nozzle. Tighten the nozzle, check seals, and replace damaged components. This is an air-seal problem, not a paint problem.
Why does my airbrush spray off-center?
Usually a bent needle tip. Even a tiny bend — invisible to the naked eye — deflects the spray pattern. Roll the needle on a flat surface to check for bends. Minor bends can be straightened on a fine ceramic stone (8000+ grit). Significant bends require needle replacement.
My airbrush works fine, then suddenly sputters mid-session. Why?
Most likely tip dry — paint is drying on the needle tip and disrupting the spray. Add flow improver to your paint mixture, and periodically wipe the needle tip with a damp cloth during long sessions. Other causes: paint settling in the cup (stir), air moisture (add a moisture trap), or debris entering the cup.
Why does my paint look grainy on the surface?
Either the paint isn’t thinned enough (pigment particles aren’t atomizing properly), the nozzle is partially clogged (creating uneven spray), or the paint pigment is too coarse for your nozzle size. Thin more, clean the nozzle, or switch to a finer-ground airbrush paint. Some craft acrylics simply won’t produce smooth results through fine nozzles.
Cost & Business Questions
Can I make money airbrushing?
Yes. Common income paths: custom T-shirts and apparel, event airbrushing (parties, festivals), custom automotive work (helmets, tanks, panels), miniature painting commissions, custom sneaker painting, and murals. Income varies widely — from side-hustle supplemental income to full-time careers. Start by building a portfolio and offering services locally or online.
How long does it take to learn airbrushing?
Basic competence (smooth coverage, simple stencil work, color mixing): 2–4 weeks of regular practice. Intermediate skill (freehand work, controlled gradients, multi-color designs): 3–6 months. Advanced technique (photo-realism, complex illustration, professional-quality work): 1–3+ years of dedicated practice. The learning curve is steepest at the very beginning — the first week is the hardest.
What should I practice on when learning?
Paper, cardboard, and cheap items from thrift stores (mugs, plates, picture frames). Practice exercises: straight lines at consistent width, dots of consistent size, smooth gradients from dark to light, writing your name in cursive, copying simple stencil designs. Use inexpensive paint for practice — you’ll go through a lot of it.
Still Have Questions?
If your question isn’t answered here, check these in-depth guides:
- Best Airbrush for Beginners 2026
- Best Airbrush Compressor 2026
- How to Choose Airbrush Paint
- How to Thin Paint for Airbrush
- How to Clean an Airbrush
- Airbrush Troubleshooting Guide
- Essential Accessories & Tools
- Airbrush Needle Sizes Explained
- Gravity Feed vs Siphon Feed
- Best Airbrush for Miniatures
- Best Airbrush Kit for Beginners
- Iwata vs Harder & Steenbeck